GST Sales with Discount at Item Level
You can record GST sales with discount at item level in TallyPrime. While recording a sales transaction, you can easily enter the discount rate or amount for each stock item. To consider discounts for GST sales, you have to create a discount ledger and then select it in the invoice.
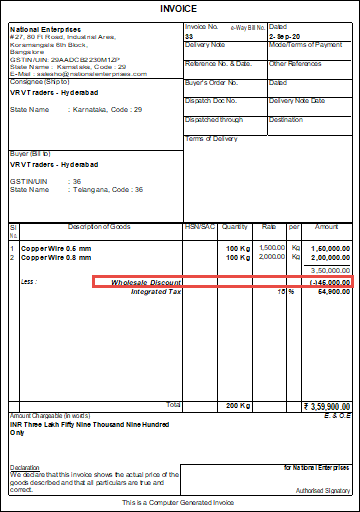
GST is calculated by considering the discount entered for each stock item after you enable the cash/trade discount option in the invoice. The corresponding tax values will appear in the GST analysis of items on the printed invoice.
Create a Discount Ledger
- Gateway of Tally > Create > type or select Ledger > and press Enter.
Alternatively, press Alt+G (Go To) > Create Master >type or select Ledger > and press Enter.
- Type of Ledger: Select as Discount from the Type of Ledger list.
Now the option Is GST Applicable? will be set to Not Applicable by default.
Record GST Sales with Discount
- Gateway of Tally > Vouchers > press F8 (Sales).
Alternatively, press Alt+G(Go To) > Create Voucher > press F8 (Sales).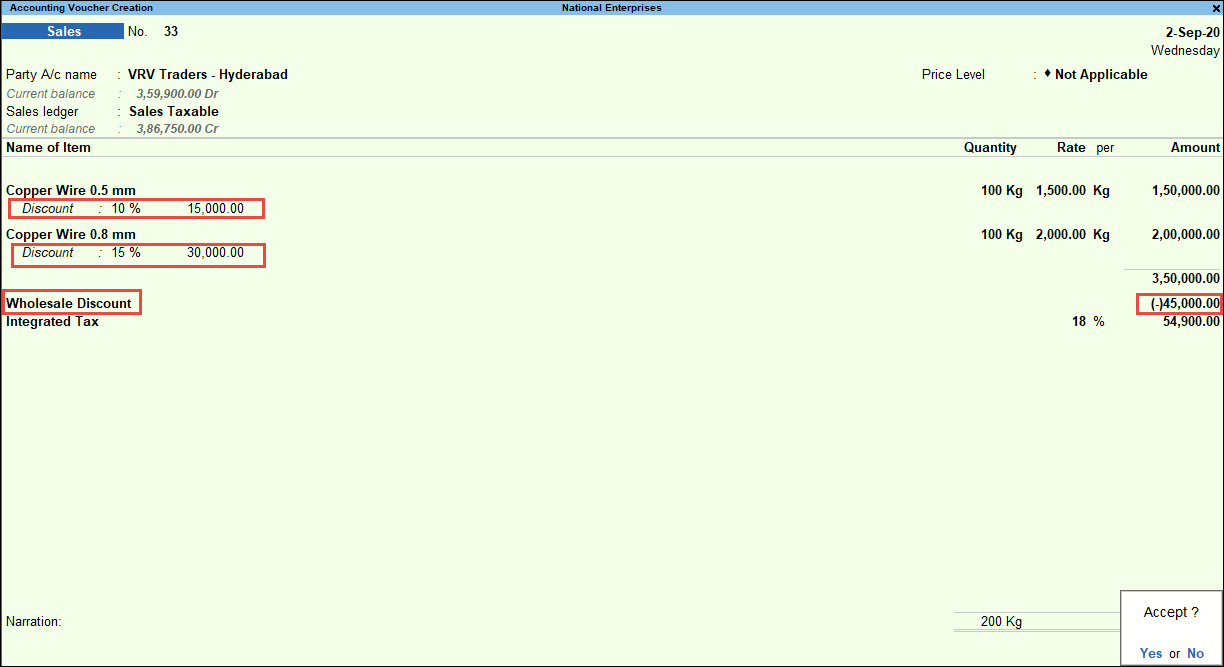
- Select the Party A/c name and the Sales ledger.
- Select the stock item, and enter the Quantity and Rate.
- In Discount, enter the discount rate or the discount amount applicable for the stock item.
- Select the discount ledger. The total discount amount will be computed and displayed.
Note: You can alter the total discount amount, if required. For example, if you want to allow a maximum discount of Rs 50,000 in a bill, and your total discount amount exceeds this amount, you can alter the final amount. The discount will be apportioned according to the discount given at the item level. - Select the applicable GST ledgers.
- To Display the Tax Analysis screen, press Ctrl+O (Related Reports) > type or select GST – Tax Analysis> and press Enter.
Note: If you are on TallyPrime Release 1.1.3 or earlier, follow the step:
To Display the Tax Analysis screen, press Ctrl+I (More Details) > type or select GST – Tax Analysis> and press Enter.- Press Alt+F5 (Detailed) to view in detailed mode of tax break-up details. The Tax Analysis screen appears as shown below:
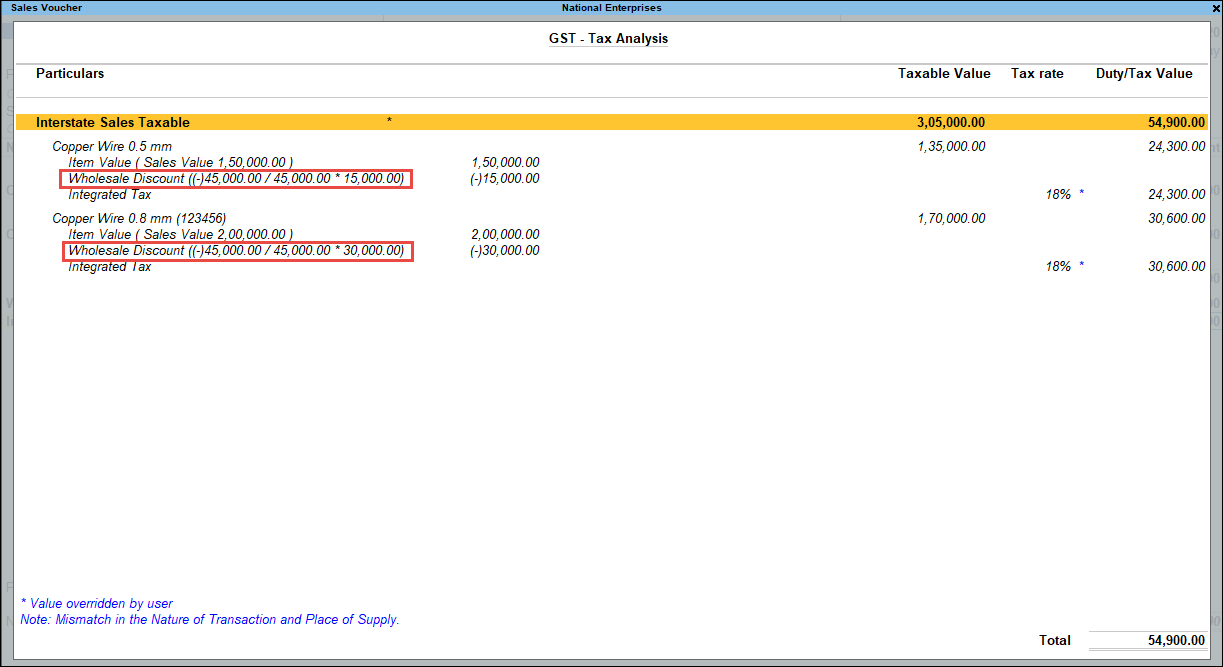
- Press Alt+F5 (Detailed) to view in detailed mode of tax break-up details. The Tax Analysis screen appears as shown below:
- In the sales invoice, press Ctrl+P and press P (Print) to print the invoice