Sales – Works Contract (VAT)
Record sales works contract details in vouchers with Sales – Works Contract as the Classification / Nature.
This nature of transaction is provided for Andhra Pradesh, Assam, Bihar, Chandigarh, Chhattisgarh, Dadra & Nagar Haveli and Daman & Diu, Delhi, Goa, Gujarat, Haryana, Jammu & Kashmir, Jharkhand, Karnataka, Kerala, Ladakh, Madhya Pradesh, Maharashtra, Odisha, Puducherry, Punjab, Rajasthan, Tamil Nadu, Telangana, Uttar Pradesh, and West Bengal.
- Gateway of Tally > Vouchers > press F8 (Sales).
Alternatively, press Alt+G (Go To) > Create Voucher > press F8 (Sales). - Select the party ledger in the field Party A/c name.
- Select the sales ledger with Sales – Works Contract as the Classification/Nature.
As always, press Alt+C, to create a master on the fly. Alternatively, press Alt+G (Go To) > Create Master > type or select Ledger > press Enter.
Note: For a common ledger, press F12 (Configure) in the invoice and set the option Modify Tax Rate details for VAT to Yes. Select Sales - Works Contract in the VAT Classification Details screen displayed on selecting the common sales ledger.
- Select the stock item, and enter the Quantity and Rate.
As always, press Alt+C, to create a master on the fly. Alternatively, press Alt+G (Go To) > Create Master > type or select Stock Items > press Enter. - Enter the percentage or amount of deduction. The Works Contract Details screen appears as shown below:

- Select the VAT ledger.
Note: Based on the state-specific tax structure, select cess/surcharge/additional tax ledger after VAT ledger.
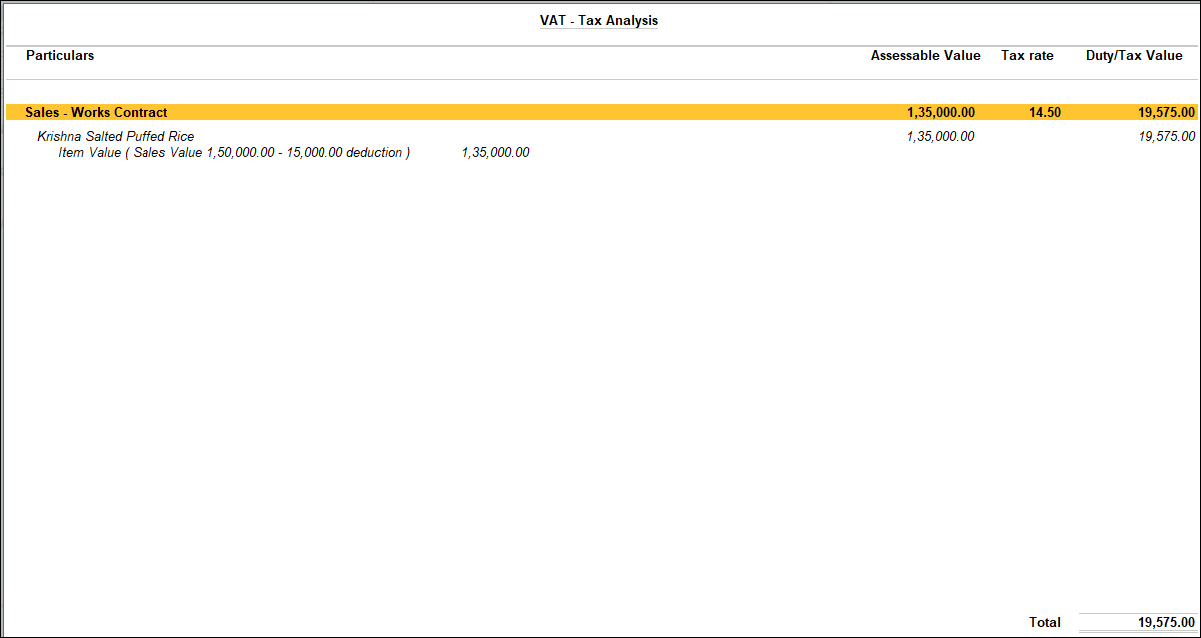
- To view the VAT – Tax Analysis screen, press Ctrl+O (Related Reports) > type or select VAT – Tax Analysis > and press Enter.
Note: If you are on TallyPrime Release 1.1.3 or earlier, follow the step:
To view the VAT – Tax Analysis screen, press Ctrl+I (More Details) > type or select VAT – Tax Analysis > and press Enter. - Press Alt+F5 (Detailed) to view in detailed mode. The VAT – Tax Analysis screen appears as shown below:

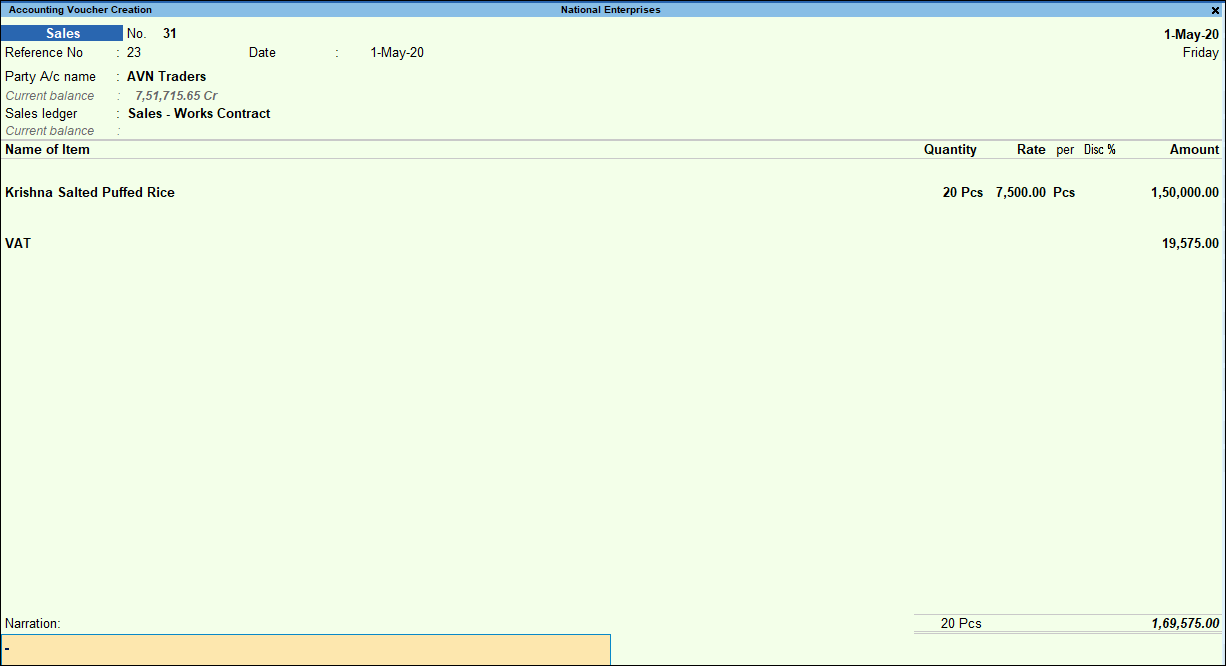
- Press Esc to return to the sales invoice. The sales invoice appears as shown below:

- Accept the screen. As always, you can press Ctrl+A to save.
Note: The option Provide VAT details appears based on the VAT feature provided for each state. For the company enabled with VAT for Dadra and Nagar Haveli, the option Is Sales Non Creditable appears in the Statutory Details screen (displayed on enabling the option Provide VAT details), which can be set to Yes/No based on the transaction.