This topic covers how to upgrade to TallyPrime and start using it, right from downloading, installing, and activating the license to recording your first transaction.
You can start using TallyPrime features in a matter of minutes. All you need to do is download the setup file, install TallyPrime, and then, activate the license.
If you are a new user, then create a company. Thereafter, you can start recording your transactions. You can also create all ledgers needed to maintain your accounts while recording transactions. And if you want to try TallyPrime before buying it, or you are a student, then you can use the Educational version.
If you are using an earlier version of Tally, then upgrade to TallyPrime. Thereafter, you can continue your business as usual.
Refer to Get Familiar with TallyPrime for details on using it.
Download and Install TallyPrime
Downloading the application setup from the Tally Solutions website is the first step in starting TallyPrime. Once you download TallyPrime setup files, you can install the application on your computer. Installation steps remain the same regardless of the TallyPrime edition you have purchased.
You can install TallyPrime on any computer with 64-bit edition of Microsoft Windows 7 or later. For further details, refer to the topic Recommended System Configuration for TallyPrime.
- Download the setup files.
- Go to https://tallysolutions.com/download/.
- Click Download.
- Select the folder where you want to save the setup.exe file.
- Click Save.
- Install TallyPrime.
- Double-click setup.exe.
- Double-click Install New.
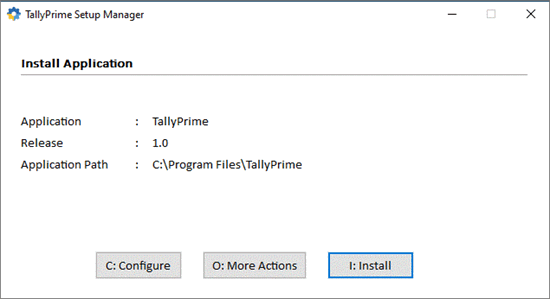
- Configure Application Path, if needed.
By default, the application will be installed at C:\Program Files\TallyPrime.
- Click Configure.
- Double-click Application Path.
- Click … and change the path as needed.
Note: If you are already using Tally.ERP 9, then it is recommended that you install TallyPrime in a different folder. This will allow you to use both the products simultaneously, if needed.
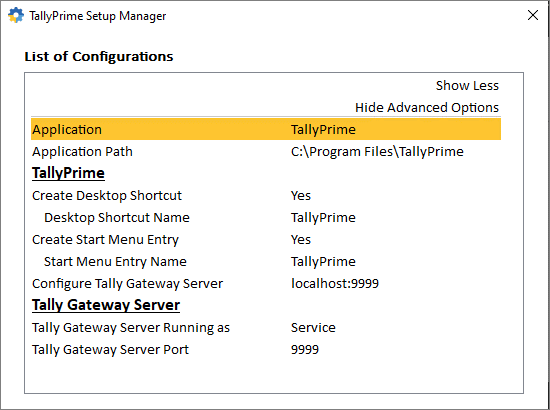
- Close the List of Configurations window.
- Click Install.
The application gets installed, and the following window opens.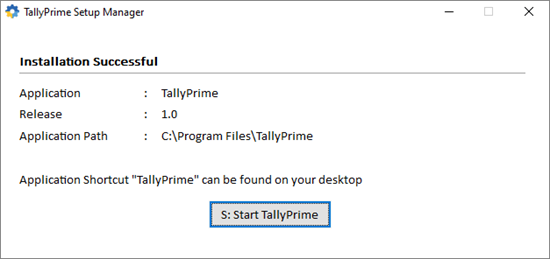
- Click Start TallyPrime to launch TallyPrime.
You can activate the license, and thereafter, you can start using TallyPrime.
How to Start TallyPrime for New Users – Activate License
If you have purchased a single user Silver License, then you can activate the license on one computer. However, if you have a multiuser Gold License, then you need to activate the license on one computer on the LAN. Thereafter, you can configure all other installations using the same license.
Activate New License
- Start your TallyPrime. The Welcome to TallyPrime screen appears.

- Click Activate New License.
- If you have a Single-Site license, then enter your Serial Number, Activation Key, and Administrator e-mail ID.
However, if you have a Multi-Site license, then refer to Multi-Site Licensing in TallyPrime for further details.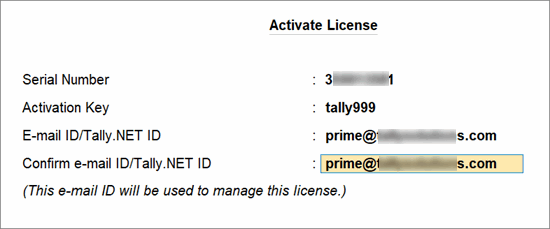
Note: The e-mail ID provided here will be linked to your account, and used for all future communication and licensing activities.
- Press Enter to proceed. The Unlock License screen appears.

- Enter the Unlock Key sent to your e-mail ID.
Note: If you have not received the unlock key, then press F2 (Get Unlock Key).
- Press Enter to unlock your license.
Once your license is unlocked, the following message appears.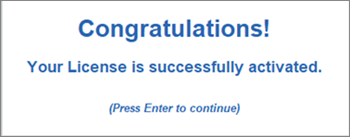
Once you activate the license, then you can create your first Company and start using TallyPrime for business transactions.
Depending on the size and scale of your business, you can have different setups. You can refer to Licensing in TallyPrime to know more about the different options available.
How to start TallyPrime in Educational version | Try it for free
If you want to try TallyPrime before you buy, or just want to learn how to use the product, then you can use the Educational version for free. In this case, you can try all features in the product. However, there will be one restriction. The voucher dates in the Educational version are limited to 1, 2 and 31.
You can start using TallyPrime in Educational mode. Once you do that, you will observe that the window title is in dark green colour and shows EDU under the product name.
Users of Tally.ERP 9 – Move to TallyPrime
If you are an existing user of Tally.ERP 9 and if your TSS is active, then you can upgrade to TallyPrime. Install TallyPrime in a new folder. Once the license is configured, you can continue to use both TallyPrime and Tally.ERP 9 as well.
Once you update the license, you can open the Company in TallyPrime. This step will do a single-click migration of the data to make it work in TallyPrime.
Update/Configure using Tally.ERP 9 License
- Start your TallyPrime.

- Click Reactivate Existing License.
Note: If you have installed TallyPrime in a different folder, then you can use both the products simultaneously, if needed.
- Enter the Tally.NET ID and password.

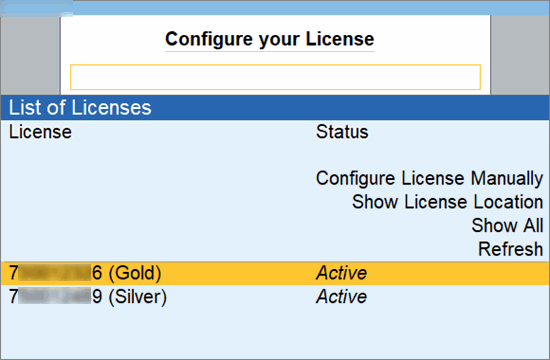
The List of Licenses screen appears. - Select the required Tally.ERP 9 license.
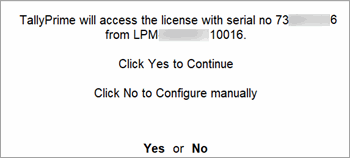
Once the license is configured to the Tally Gateway Server, you will receive the following message. - Select Yes to activate.
The List of Companies screen appears. - Select the required Company to continue.
Your TallyPrime application is now licensed. You can start using TallyPrime for business transactions.
Migrate to TallyPrime
- Open the required Company.
You will be prompted to do a migration.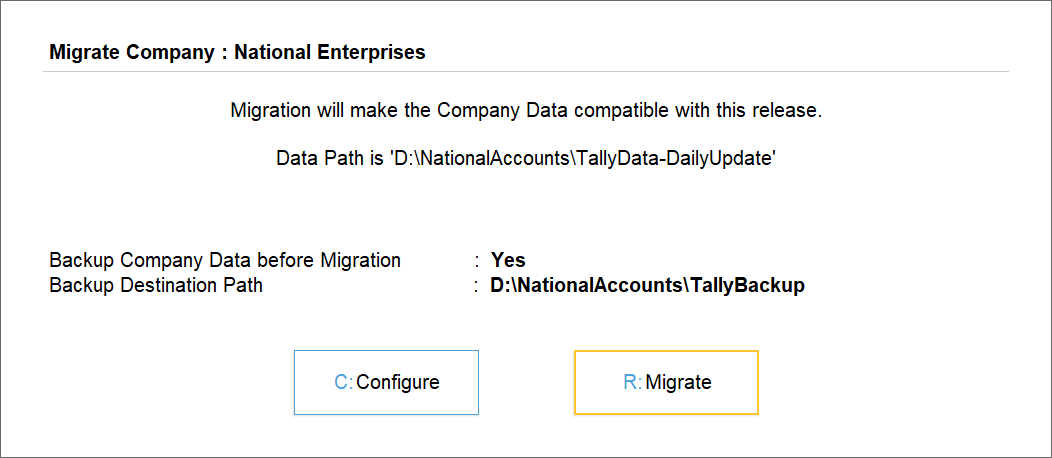
- Click Migrate.
Thereafter, the Company will be migrated, and will remain open for you to continue as well.
Since you had been using Tally.ERP 9 so far, you can continue from where you stopped.
Update to the Latest Release of TallyPrime
Information on the latest releases of TallyPrime is easily available now. Once a new TallyPrime release is launched, if you have a valid TSS, then you will see a notification alert. Based on your needs, you can choose to upgrade to the latest release of TallyPrime.
However, if you have not upgraded to the latest release and have a valid TSS, then you will see a red dot adjacent to F1 (Help). The red dot indicates that the latest release for TallyPrime is available. You can upgrade to the same as per your convenience.
- Press F1 (Help) > Upgrade. The following screen appears.
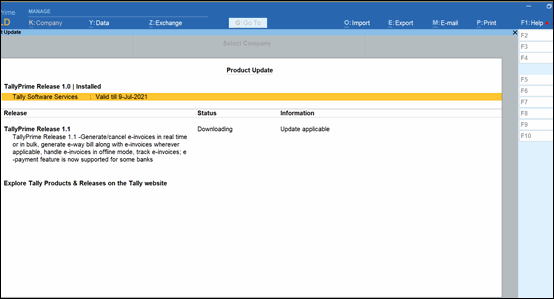
If you are already on TallyPrime and a new update or release version is available, you will see a red dot mark against Upgrade.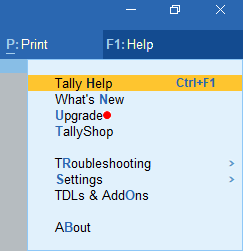
- Select the latest available release and press Enter. For example, select TallyPrime Release 1.1.
Thereafter, a message appears prompting you to confirm download and installation of the latest release.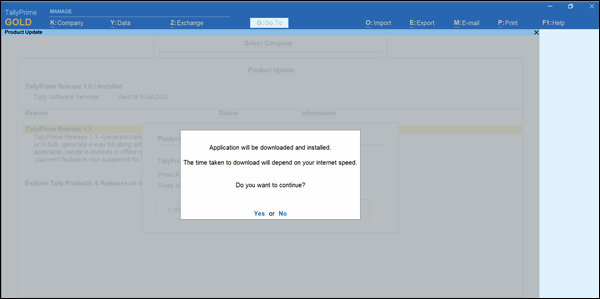
- Select Yes. A message appears confirming that TallyPrime will start with administrator rights.
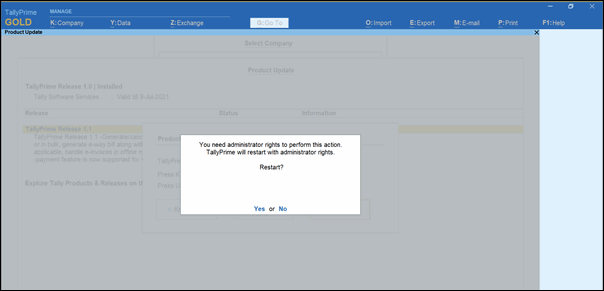
- Press Enter to continue.
- On successful update to the latest release, select Start TallyPrime.
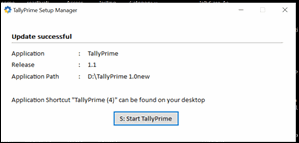
Then, the latest release of TallyPrime will open.
Thereafter, you can open your company data and start recording transactions using the latest release.
Start Using TallyPrime for Your Business Transactions
Once you have activated your TallyPrime license, and if you are a new user, then you need to create a Company. Thereafter, you can start using TallyPrime to record your business transactions.
Create Company
- Create>Company.
Alternatively, Gateway of Tally>Create Company. - Enter the Company Name, Mailing Name, and Address.
While Company Name is for reference in the application, Mailing Name will be printed in all reports. - Select the State and Country.
Based on the country selected, the statutory options will vary. - Verify the Financial year beginning from and Books beginning from dates.
- Set security details, if needed.
- Verify the Base Currency details.
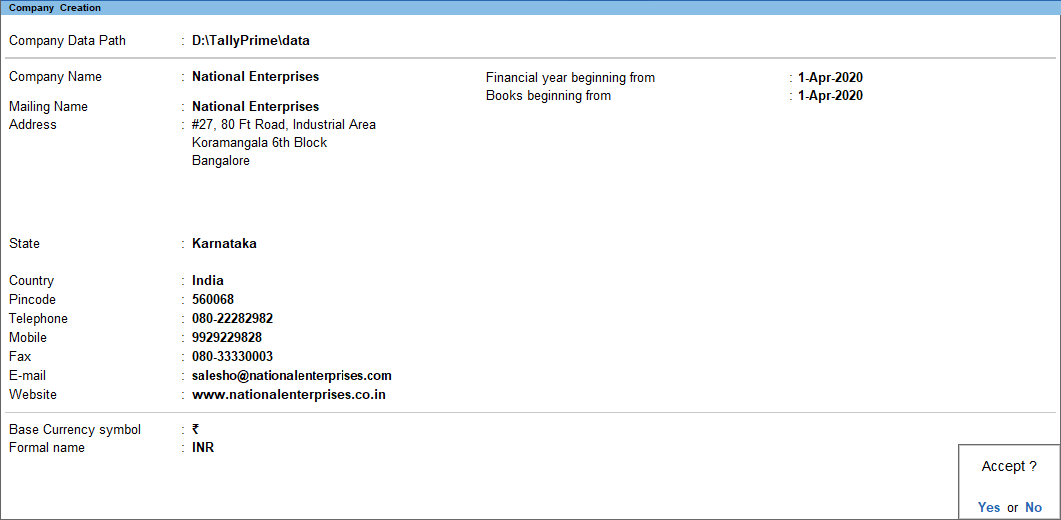
- Accept the Company screen.
Thereafter, a confirmation screen appears with the list of features that you can enable.
- Set up the features as needed. You can do this later too.
Refer to Working with Company for further details on creating and using Companies.
Once you create the Company, you can start recording the transactions directly.
Record your first transaction
Voucher entry in TallyPrime remains similar, regardless of the type of transaction you choose.
For instance, consider the case of recording a sales entry. You can directly open the sales voucher and then start entering the details.
- Open the voucher screen.
- Alt+G (Go To) > Create Voucher > press F8 (Sales).
Alternatively, go to Gateway of Tally > Vouchers > press F8 (Sales).
- Alt+G (Go To) > Create Voucher > press F8 (Sales).
- Specify the buyer details.
- In Party A/c Name, select Cash or Bank for cash sales. For credit sales, select the party name.
- On the Dispatch Details & Order Details screen, specify the details if you want to print in the invoice.
Alternatively, press Ctrl+A to proceed without entering the details. - On the Party’s Details screen, specify the required details.
- Select the accounting ledger for item allocation.
- In Sales ledger, select the required ledger created under Sales Accounts group.
In any transaction, you can create ledgers on the fly by pressing Alt+C.
- In Sales ledger, select the required ledger created under Sales Accounts group.
- Select item details.
As explained above, you can also create the item on the fly by pressing Alt+C.Note: The quantity can be entered only if the UOM is specified in the Stock Item ledger for the particular items entered in the voucher.
- Enter the Quantity and Rate or Value.
- Provide Narration, if any.
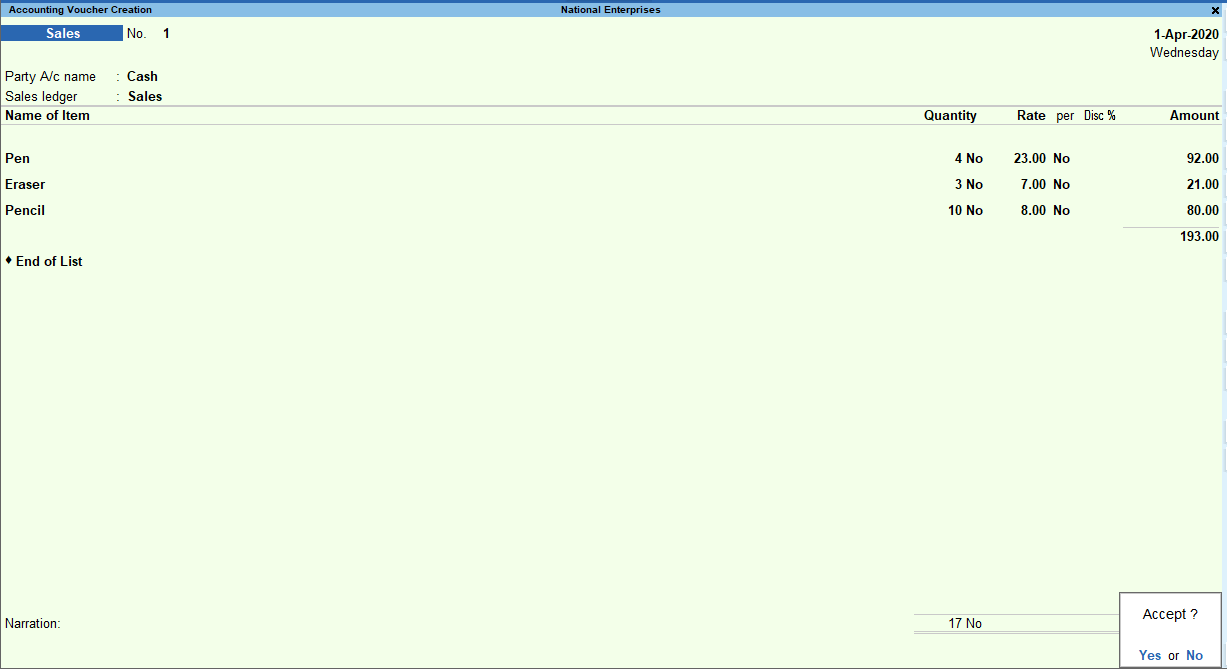
- Press Ctrl+A or press Y in the Accept message box to save.
Tip: If you are creating a back-dated voucher, press F2 (Date), set the date of sales, and press Enter. It is imperative that the date you enter falls in the set CURRENT PERIOD that you can see on the Gateway of Tally.
Similarly, you can record the other types of transactions, using the default Voucher Types in TallyPrime.
Further, you can use Voucher Mode/Double Entry mode, or Accounting Invoice Mode for voucher entry.
Refer to Sales Process for further details on recording the different types of transactions in a sales cycle.
View reports
Once you record transactions, you can view the related reports immediately. For example, you can check the Day Book to see the list of transactions recorded in the day.
- Press Alt+G > Day Book or Go to Gateway of Tally > Day Book.
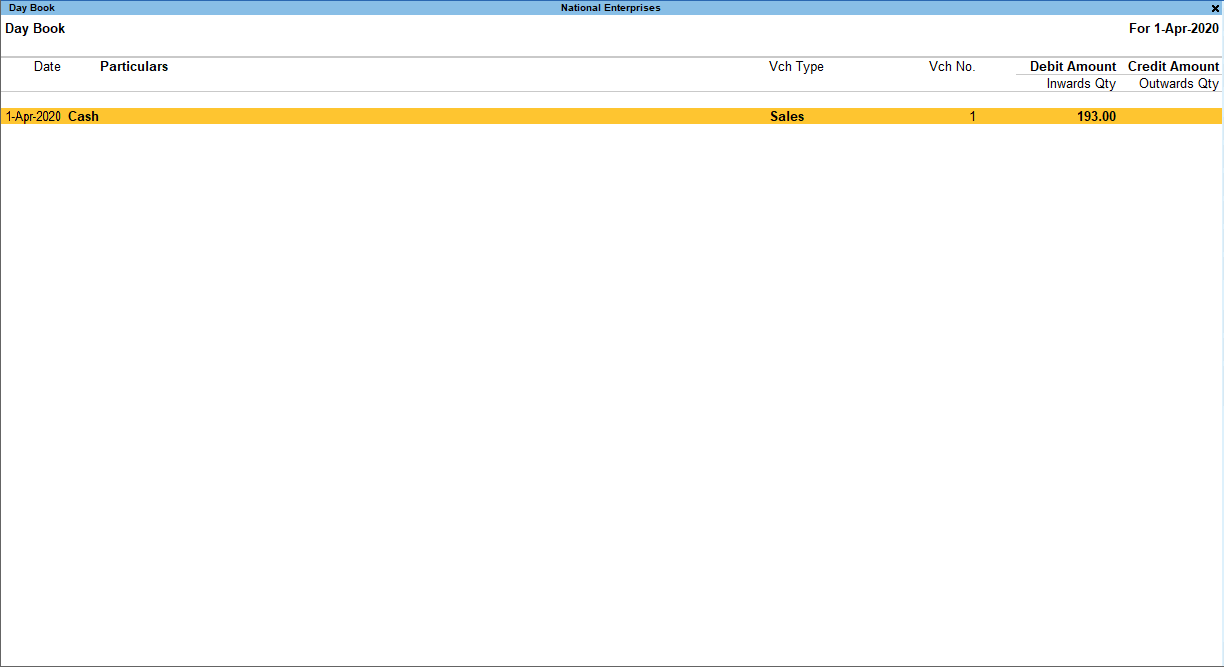
Thereafter, you can view the transactions you have recorded in the CURRENT DATE shown in Gateway of Tally.
Similarly, you can view the other accounting, financial or inventory reports.
