Defining Tax Rates at Ledger or Stock Item Level (VAT)
For businesses dealing with multiple items having different tax rates, VAT rates can be configured at the ledger level, and stock item level.
Define Tax Rate at Ledger Master
Create Classification for Specific Tax Rate
Define Tax Rate at Ledger Master
- Gateway of Tally > Create > type or select Ledger > and press Enter.
Alternatively, press Alt+G (Go To) > Create Master > Ledger > and press Enter. - Enter the Name of the ledger.
- Select Duties & Taxes from Under field.
- Select VAT in Type of Duty/Tax field.
- Set Use for Purchase Tax to No.
- Enter the VAT rate in Percentage of Calculation. The rate entered here is used for calculating VAT in the invoice.
Note: In an invoice, if the rate predefined for the selected item is different from the rate specified in VAT ledger, the calculation will not happen due to mismatch in predefined rates of item and VAT ledger master.
The Ledger Creation screen appears as shown below: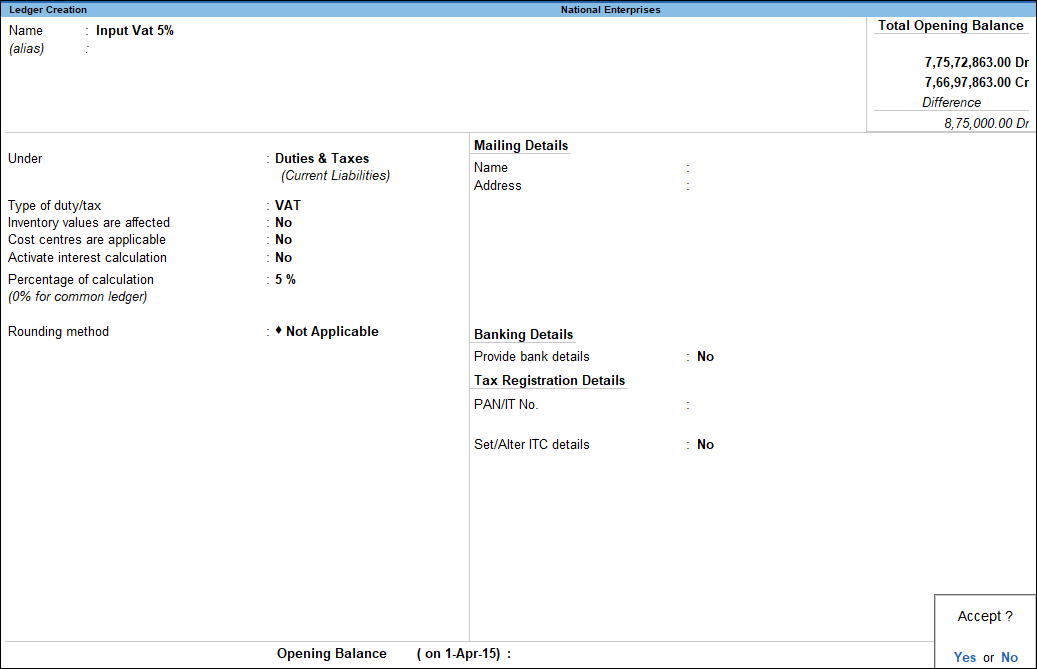
Define Tax Rate in Stock Item
- Gateway of Tally > Create > type or select Stock Item> and press Enter.
Alternatively, press Alt+G (Go To) > Create Master > Stock Item > and press Enter. - Enter the Name of the stock item.
- Select the required group from Under field.
- Select the required unit of measurement in Units field.
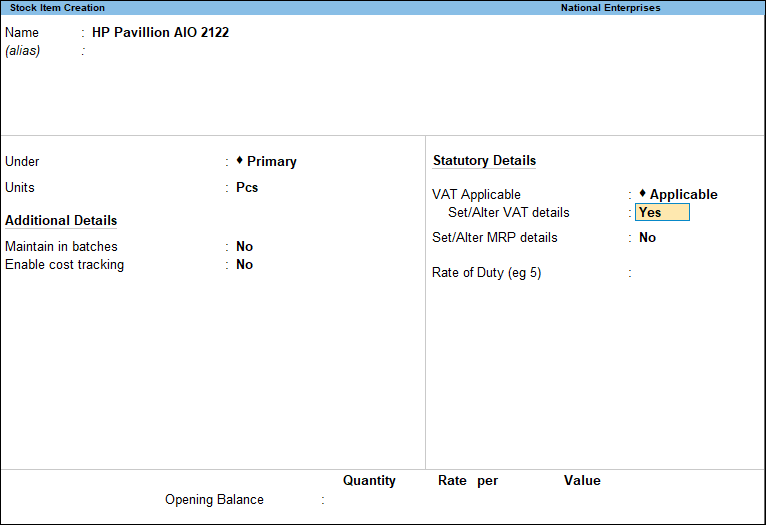
- Select Applicable in VAT Applicable field.
- Set the option Set/alter VAT details to Yes, as shown below:
To enter the VAT Details
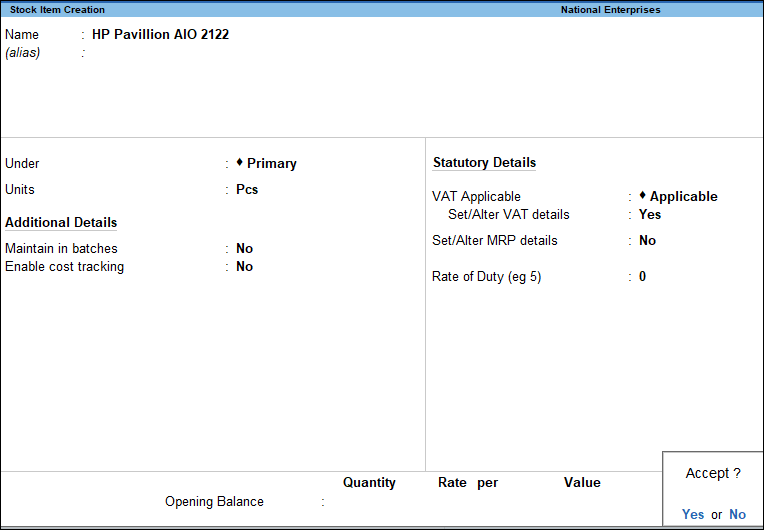
- Enter the Tax Rate in the VAT Details screen.

- Press Enter to save the VAT Rate Details screen.
- The Stock Item Creation screen appears as shown below:
- Press Enter to save.
Create Classification for Specific Tax Rate
- Press F11 (Features) > set Enable Value Added Tax (VAT) to Yes.
If you do not see this option:
. Set Show more features to Yes.
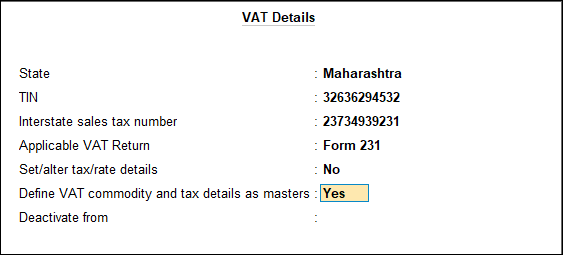
. Set Show all features to Yes. - Set the option Define VAT Commodity and tax details as masters to allow creation of rate specific classifications, if required. The VAT Details screen appears as shown below:
Create a user defined classification
- Gateway of Tally > Create > type or select VAT Classification > and press Enter.
Alternatively, press Alt+G (Go To) > Create Master > VAT Classification > and press Enter. - Enter the Name of the new classification.
- Select VAT in Type of Duty/Tax.
- Select the required Nature of Transactions.
- Enter the applicability dates with the corresponding tax rates in Applicable From and Tax Rate columns respectively.
Note: The taxability category is selected based on the rate entered in Tax Rate. If a value other than ‘0’ is entered in Tax Rate, Taxability gets defined as Taxable. If ‘0’ is entered, Taxability can be selected as Exempt or Tax Free. Multiple tax rates can be entered with corresponding date of applicability and taxability types.
The VAT Classifications screen appears as shown below: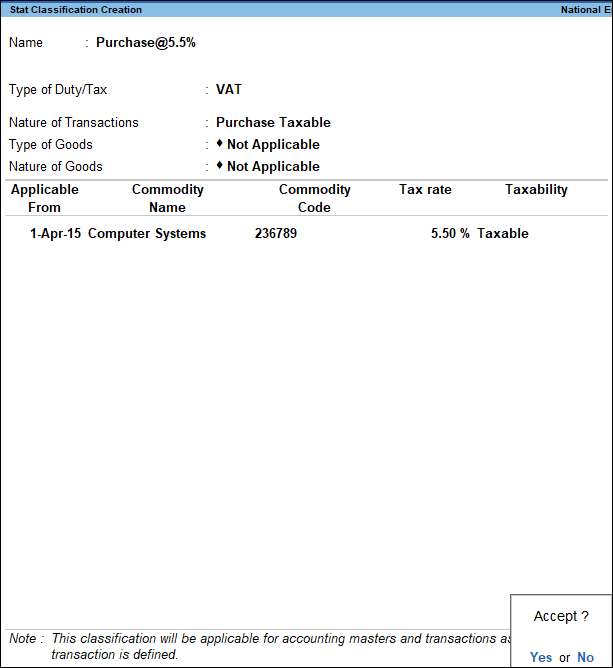
- Press Enter to save.